I’ve discussed the holy grail of pixel mapping for the Sony E2000-series LCD projection televisions before. With the latest nVidia drivers on Vista, I believe I’ve found the most practical solution to this issue.
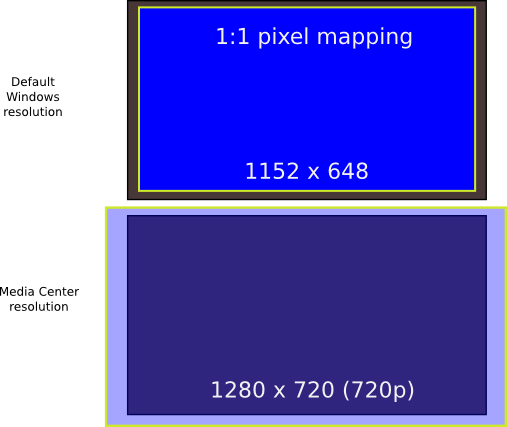
First, it’s notable that even using the HDMI inputs, 1:1 pixel mapping doesn’t seem easily attainable from a PC. While the native resolution of this particular TV is indeed 720p (1280×720, progressive), there is still a significant amount of overscan to account for.
My particular solution involves setting two display resolutions. The first is a 1:1 (or approximate) pixel mapped image when at the Windows desktop, set at 1152×648. This resolution is automatically detected in the Windows Display control panel and nVidia resolution list when connected with a DVI to HDMI cable. The second is a full 720p image while in Windows Media Center, which can have its own resolution detected independently:
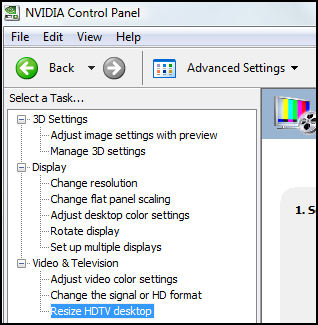
To set up this type of display mapping, first install the latest nVidia drivers. Once installed, you should have an nVidia Control Panel option when right-clicking the desktop. Use “Advanced Mode” if prompted.
- In Windows or the nVidia control panel, change your display resolution to 1280×720.
- In the nVidia control panel applet, there should be a new “Resize HDTV Desktop” setting at the bottom of the tree view. Select this option.
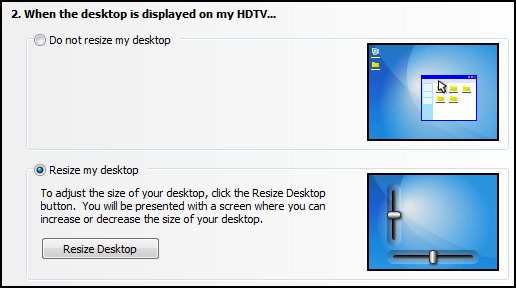
- The right panel contains a frame for the “Resize my HDTV Desktop” option. Click this option, then click the Resize Desktop button.
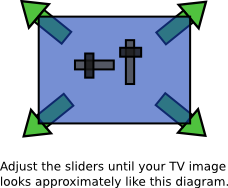
- When resizing the desktop, size it so that the arrows are slightly outside your HDTV display area. I find that putting the arrowheads offscreen (so that only the bottom parts of the arrows display) is the best setting.
- Close the resize desktop dialog and click OK (if available) in the nVidia control panel. Open the Display control panel again and change the resolution to 1152×648.
- You should now be able to see all desktop contents, in a 1:1 or close to 1:1 display. Try adjusting TV display settings, if possible, to improve the display quality.
- When ready, start Windows Media Center and run the Display wizard. Select 720p resolution. Media Center will automatically correct for some overscan.
- Try playing a high definition, 720p or higher video. If there are black borders surrounding the video, you’ll need to close Media Center and repeat this process, but increase the desktop resizing correction. When Media Center closes, verify that your resolution returns to a standard 1152×648 so that the Start Menu and desktop are completely visible.
It might not be a perfect solution, but it’s a significant step up from previous solutions involving third party utilities. Did it work for you, or do you have any other suggestions? Let me know in the comments.