My girlfriend Kayla and I both recently purchased new DSLR cameras – she owns the Nikon D5000 and I have a Canon T1i. Mine has mostly been used for macro photography and not anything too serious yet, but I quite enjoy it so far. I’m hoping it doesn’t end up like what Dave and Warren consider my most foolhardy purchase, a MIDI keyboard that I’ve allegedly never used. (They may not laugh as much when Rock Band 3 launches, since it should work with the game.)
One of the main issues I ran into was not wanting to purchase a SD card from Best Buy or another retailer, since places like Canada Computers and NCIX have the equivalents for significantly cheaper. Up until this point I’d just been using a 1GB PNY card, so I transferred it to the T1i and started taking shots. The 1GB size is good for about 200 to 250 pictures in JPEG format.
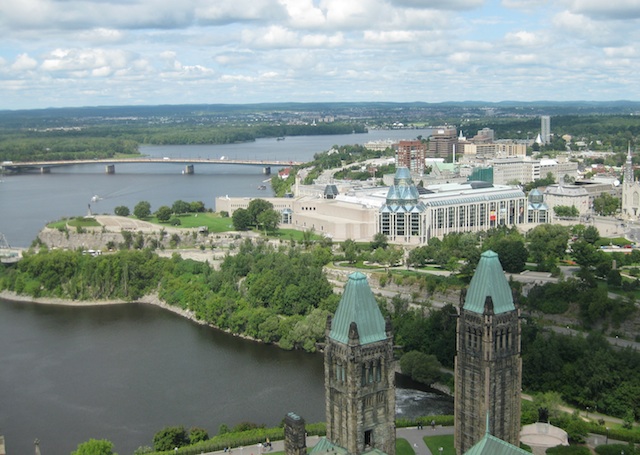
My issue and story really begins when I switched laptops and neglected to back up my iPhoto library or the original JPEG files. All of my media files are stored on a server, and the photos for one reason or another didn’t make the cut. Most of these photos weren’t a huge loss, but there were some shots of an Ottawa trip that I’d never really gotten around to categorizing.
Armed with the SD reader in my laptop, I used a command-line utility called PhotoRec to examine the contents of two SD cards. Both cards had been formatted multiple times: the first one displayed no files in Finder, and the second one had been wiped for Wii savegames.
Process
Here’s the process that I found worked best on a Mac, after downloading and extracting photorec and testdisk to a temporary directory:
1. Insert the SD card into the onboard reader. (I didn’t have any luck with an attempt reading directly from the camera, so I’d suggest using a dedicated SD card reader if at all possible.) Ignore iPhoto if it comes up.
2. From the command line, change to the temporary directory and run:
sudo ./photorec
and provide your account password.
3. Select the “Disk /dev/rdiskX”. It’s best to look by size – my “blank” 1GB SD card appeared as /dev/rdisk3 with 1030MB / 982MB sizes. Continue with selecting a Intel/PC partition table.
4. Choose “No partition [Whole disk]” when prompted, rather than the FAT32 partition. This ensures the entire SD card is searched and made a difference in the number of photos recovered from the Wii-formatted card. The filesystem will be Other (FAT).
5. Select the directory to extract to. PhotoRec will create a subdirectory whereever you select called recup_dir.N where N is a number.
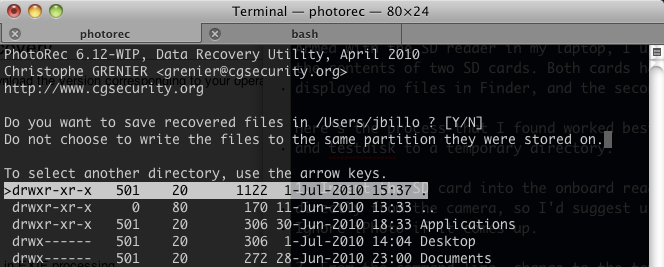
6. Examine your photos once the process is complete. Certain photos may only have thumbnails (tNNNNNNN.jpg) available. You can remove these at the command line by changing to the recup_dir.N directory and running:
sudo rm -rf t*.jpg
7. Feel free to change ownership of the files if you would like to modify them. This can be done through Finder by selecting all of the photos (Cmd+A), choosing File > Get Info, unlocking the Sharing and Permissions panel and allowing your username or everyone read and write permissions. (The command line equivalent would be sudo chmod o+w *.jpg in the recup_dir.N directory.)
Results
Of about 300 photos on each card, 244 were recovered successfully from the first card and 65 from the second card used for Wii savedata. PhotoRec worked as intended and now I have some additional files for my Flickr account! I leave you with a sample view from Parliament in Ottawa.
Comments are closed.