After a bit of house tidying over the past few days, I managed to locate the power adapter for my Lenovo X230 laptop. Upon booting it up I realized that it had accumulated a number of outdated applications and crufty configurations, so I wanted to restore it to factory settings. Ordinarily I would immediately image with a stock Windows ISO, but since I’d paid for a Win7 Pro license, and wanted all the Lenovo applications restored (volume/brightness OSD, battery monitor in taskbar) I specifically wanted to restore to the OEM version and then remove the trialware.
The first problem that I ran into was that since Linux has been on this machine, and I’ve swapped the internal HDD to an Intel SSD, the partition table and MBR weren’t exactly in original. As a result, the common technique of pressing the ThinkVantage button at startup (or Enter, when prompted) and choosing to restore the system (or pressing F11) wasn’t going to work; the option is simply not present. To be clear, I still had three partitions in place: primary partition 1, a 1499MB “SYSTEM_DRV”; primary partition 2, a ~208GB “Windows7_OS” partition mapped to C:\, and primary partition 3, a 13.67GB “Lenovo_Recovery” partition mapped to Q:. The SYSTEM_DRV and Lenovo_Recovery partitions all still had their files intact.
My first attempt was to hit F8 at boot, just prior to the Windows logo appearing, and select the “Repair your computer” option. From the WinPE-style GUI, I selected the bottom option called Lenovo System Recovery from the usual list of repair options (Startup Repair, Command Prompt, System Restore, etc.) This unceremoniously bombed out with a “Recovery failed” message and the wizard would not proceed. The Internet was generally pretty useless on this point, although various guesswork posts suggested that if you didn’t have a pristine OEM partition table the process would fail.
The next option was to try and create a set of recovery disks from Windows. Of course, the X230 doesn’t actually have a DVD-RW drive, so I figured I’d have to trick it into writing to USB somehow. Running the “Create Recovery Media” application (or Q:\LenovoQDrive.exe) I was thwarted by some quasi-DRM mechanism that insisted that I’d already created a set of media and to go away. Who knows, I may have managed to get it to create disks to an external DVD writer when I first bought the machine. As a side note, you’ll want to enable viewing of hidden and system files to more easily work with the Q drive and review its contents.
The Internet was much more forthcoming on bypassing this ludicrously stupid mechanism with StackOverflow to the rescue, and apparently there’s two very similar ways to restore recovery disk creation, depending on your laptop:
- The utility uses an NTFS alternate file stream in Q:\FactoryRecovery\Recovery.ini:DONE, set to 0 and a newline when the media set hasn’t been created and 1 and a newline when in “no recovery set for you” mode. The fix:
echo 0 > Q:\FactoryRecovery\RECOVERY.INI:Done - If this doesn’t work, edit Q:\FactoryRecovery\service_done.ini, and set DONE=0.
Unfortunately this entire process was fruitless, because even when I was able to get the recovery application to start and agree to begin creating disks, I was beset by this lovely error:
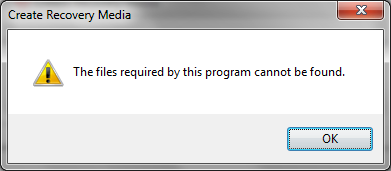
The next thing I tried was to install a newer version of Lenovo Rescue and Recovery (4.52), which also failed during the second phase of the installer with a return code 6 error message. Once again, this seemed to be related to my partition and bootloader monkeying.
At this point I’d had enough time to inspect the contents of the Q drive, and determined that there were several key files that would recover the system partitions:
- Q:\factoryrecovery\cdrivebackup.swm through to Q:\factoryrecovery\cdrivebackup6.swm – a multipart WIM file with the original contents of the C:\ partition
- Q:\factoryrecovery\sdrivebackup.wim – a single part WIM file with the original contents of the S:\ partition
There are a number of tools that will read WIM and SWM files, but the most popular referenced one is imagex.exe, part of the Windows Automated Installation Kit. It’s since been replaced by DISM for Windows 8, but I managed to get things restored with imagex. In case you don’t want to download the entire 1.7GB WAIK archive, here is the 64-bit version of imagex that worked for me.
I followed approximately the same steps from this Lenovo forum post with some minor changes:
- I created a Windows 7 Pro SP1 installation USB stick from ISO and imaged it to a USB drive with the Windows 7 USB/DVD Download tool. If you need a Windows 7 ISO, I suggest looking for Digital River links and verifying the hashes against the original versions. This isn’t piracy – these ISOs still need a product key but we won’t even get that far, since we’ll be restoring the Lenovo copy of Windows.
- Copy the imagex.exe file to the root of the USB stick.
- Boot to the Win7 USB stick in BIOS, then choose the Command Prompt option. Determine where all your drives are mapped and replace drive letters in the commands below to reference the appropriate drive. For me, the mapping showed up as:
- C:\ – 1499MB SYSTEM_DRV partition
- D:\ – 208GB Windows7_OS partition
- E:\ – 13.67GB Lenovo_Recovery partition
- F:\ – USB stick containing Windows 7 ISO contents and imagex.exe
- X:\ – memory-mapped Windows PE contents
- Run the diskpart commands from the original post from phil5 with the following changes, replicated here for posterity. Lines beginning with # are comments for readability, don’t type them:
diskpart
list disk

# This shows a list of drives attached to your system. In my case I had two disks, disk 0 (solid state drive) and disk 1 (USB stick that I booted Windows from.)

select disk 0

list partition

# Determine the correct partitions for SYSTEM_DRV, Windows7_OS and Lenovo_Recovery. The following operations will be destructive so make sure you have the correct partitions selected!

# Deleting SYSTEM_DRV (S:\)

select partition 1
delete partition

# Deleting Windows7_OS (C:\)

select partition 2
delete partition

# My original partition 1 was 1499MB, not 1199MB as indicated in the original post; command has been adjusted

create partition primary size=1499
select partition 1
active
format fs=ntfs label="SYSTEM_DRV" quick
assign letter=s

create partition primary
select partition 2
format fs=ntfs label="Windows7_OS" quick
assign letter=c

exit
- Recover the system with WIM/SWM files from the Lenovo_Recovery partition on Q:\ – the C drive is a multipart SWM archive and requires the /ref switch:
F:\imagex.exe /apply /verify Q:\factoryrecovery\Sdrivebackup.wim 1 S:\
F:\imagex.exe /apply /verify /ref Q:\factoryrecovery\Cdrivebackup*.swm Q:\factoryrecovery\Cdrivebackup.swm 1 C:\
- Once complete, run the X:\bootrec.exe /fixmbr and X:\bootrec.exe /fixboot commands. Choose the Reboot option in the GUI, and again boot to the Windows 7 USB media. When entering, I was prompted to repair my boot process and restart – this was successful in bringing Windows back to a “Preparing to start your computer for the first time” splash screen and restoring the normal boot order.
After this process, you can run through the usual mechanisms of removing the Norton Internet Security trial and clicking OK to hilariously-worded dialog boxes like:
Congratulations! I would suggest that you perform the following action to make your life easier in future, since I still wasn’t able to successfully create a set of official recovery media after this was all done.
Get a 16GB or larger USB stick – 32GB would be ideal. Image it with a Windows 7 Pro SP1 ISO via the USB/DVD creator tool, then copy the Q:\factoryrecovery folder and imagex.exe to it. That way you have an all-in-one restore mechanism for your ThinkPad that can be run even if the Q:\ partition is removed in a horrible accident.
For now I’m just happy to have the system running again, even if I have 769.1MB of updates pending to download and install.