I’ve been out of the Microsoft/Windows world for a fair bit of time – my primary work machine is an M1 MacBook Pro, I spend at least part of my day in some type of Linux terminal, and while I do have a personal Lenovo T14 laptop and a desktop running Windows 11, it’s mainly to run “Chrome” or “game” or “Office” and the underlying operating system matters much less.
A few months back, though, I picked up a couple Samsung 970 EVO Plus NVMe M.2 solid-state drives on sale, and took the opportunity for a fresh installation of Windows. My additional hope was that the new installation (on a desktop with a Core i9-9900K, 32GB RAM, GeForce GTX 1080 Ti) would actually seem performant, like I recall used to be possible on reasonable hardware in the Win2K/WinXP/Win7 days. On the desktop, a not-unreasonable number of tabs would often result in a text editor or browser, and so starting clean on a fairly performant SSD, then reviewing the latest hivemind guidance for security and performance seemed like it would be worthwhile.
I did remind myself that crucially, when I was running Win2K Pro, I also didn’t have a pair of 4K-resolution monitors running at 150% scaled resolution; at best I was doing 1280×1024 on a Sony Trinitron (but at a much higher refresh rate!) That era of software also didn’t contain embedded Chromium or Electron components, which chew system resources as a tradeoff for ease of development and cross-platform functionality.
I also expect that most of my tasks for this machine absolutely could be done on Linux – it is probably worthwhile to set up another SSD with a recent desktop distribution and a lightweight window manager – but desktop Office and video games are things I want to actually do with this machine.
What follows are a few notes that got me along the way as well as some personal opinions on why I made certain choices.
Pre-setup
I wanted as much of a “clean” installation of Windows as possible, so I built a USB stick to boot from using the Windows 11 media creation tool. I didn’t need to go to the ISO download and use Rufus – in the past, occasionally the official tool failed halfway through, or at the very end, or didn’t produce something bootable at all – but that was likely around the initial Windows 10 launch timeframe.
Before rebooting and choosing the USB stick as my boot device, I also attempted to clear my synced Microsoft Account/Windows settings. There was an option later on during the Win11 OOBE to “set up as a new PC”, but I did want as default of an experience as possible to start. Using the Microsoft Support article, I first deselected all the options in the Accounts > Windows backup panel (the screenshot below shows them in their “enabled” state):
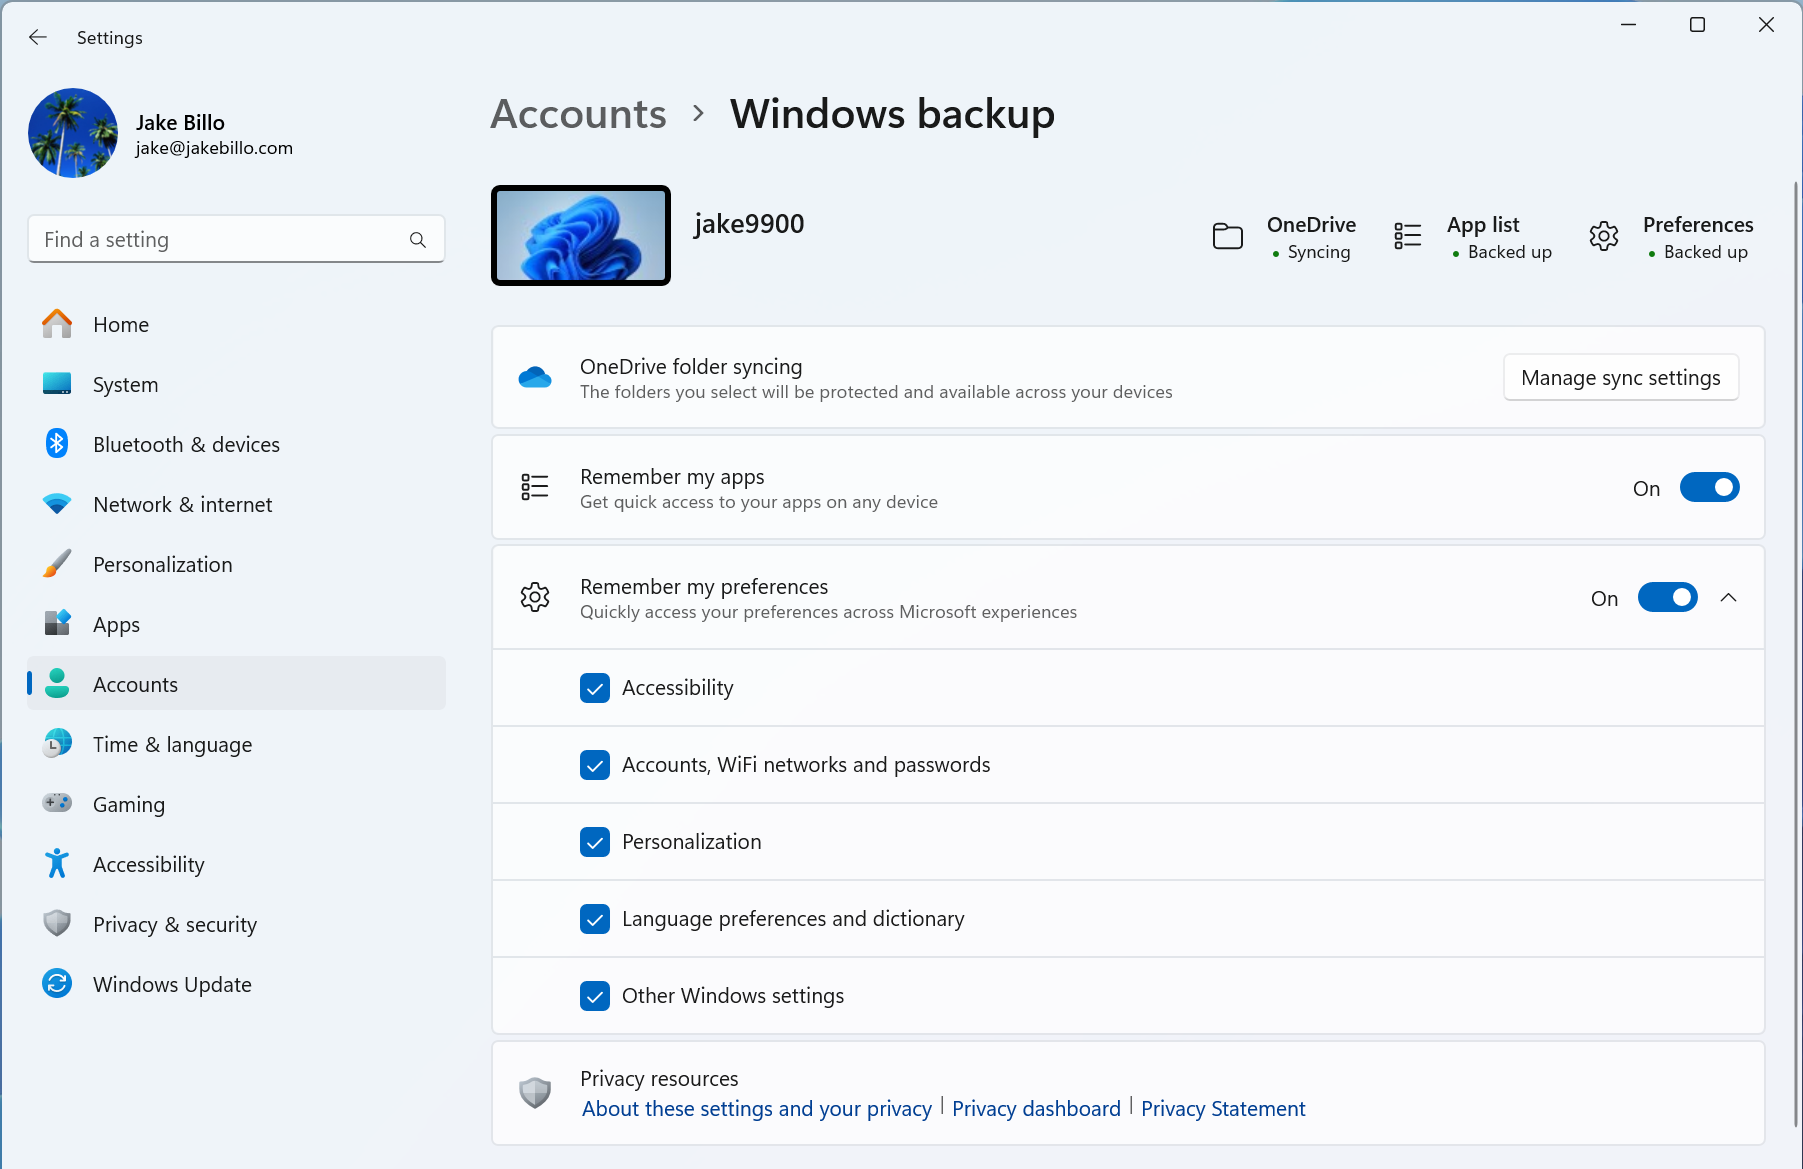
Then, I went to account.microsoft.com/devices and removed my desktop from the list of devices, and also chose the Clear stored settings link in the Cloud synced settings section at the bottom of the page.
Installation
I started out following the guide from SwiftOnSecurity’s semi-abandoned Decent Security site, but didn’t take a lot of the advice initially. My BIOS/UEFI was fairly recent (updated around the Win11 release timeframe), already had some of the settings applied, and a lot of the steps seem more applicable to the physical nature of laptops or desktops in shared spaces.
I did end up going back after Windows 11 was up and running and confirming the BIOS was the latest version available (there was a version on Asus’ site that had to be downloaded separately, and was not available though the UEFI-based Internet update mechanism), as well as installing the Intel Management Engine driver and then updating the firmware from within Windows. I also did turn Secure Boot back on to the Windows UEFI setting as well.
The installer was pretty much as I remember it from the Windows 7 era after booting to USB. I chose not to provide a product key, as the machine already was activated and has a digital entitlement. For destination, I selected the partitionless SSD from the list directly (not creating any new partitions).
Notably the USB stick I used was a USB 2.0-era Lexar 8GB, and I didn’t feel appreciably throttled by the installation speed – it would have taken longer to dig up a USB 3 stick than the extra time it took to copy the installation files to the SSD.
I also do still have to fix the boot manager. Apparently the EFI partition and bootable disk is one of my SATA SSD devices, so after installation I was greeted with a repair screen. After reboot I got a menu, selected Windows 11, and didn’t explicitly need to do any repair operations – but this will be something I want to fix to avoid even a 5-second delay at boot.
(This ended up being a fairly involved process; I was able to use some of the steps from a semi-advertisement post at https://www.partitionwizard.com/news/create-efi-partition.html – and use diskpart to create a new EFI partition, then assign a letter to it and then use bcdboot to get the bootloader operating as anticipated.)
Out-of-box configuration
I don’t have a ton to say about the OOBE options (either pre-desktop or when first launching Edge) and some of these will be pretty personal. Microsoft is clearly pressing data collection, Edge and Office subscriptions. Of the ones I deliberately chose, I turned off targeted ad tracking, did not permit Edge to import settings, disabled enhanced data collection. I already have a family subscription to Microsoft 365 so there were no “special offers” present.
After Round 1 of Windows Update, I used Edge initially to browse back over to Decent Security, declining any profile sync options, but somehow ended up with uBlock Origin as an already-installed extension, so clearly something had the chance to sync prior to that choice. I did set UAC to the highest setting, grabbed Chrome x64 with the .msi installer and Firefox x64, made sure the browsers booted and had uBlock Origin installed.
While my browser installation is out of order from the original instructions – which are rightfully conservative, because a bad ad on one of the default Edge pages could absolutely cause issues before you get a chance to further lock things down – I was already past that point.
I’ve also have not enabled BitLocker disk encryption. Again, a desktop located inside my home has a much different threat model than a laptop, and there appears to be a good degree of performance degradation possible with BitLocker’s software-based encryption. This forum post [archive page 1, archive page 2] gives excellent instructions on how one might turn on the hardware-backed encryption on a Samsung SSD, but it may require performing a Secure Erase and starting everything from scratch.
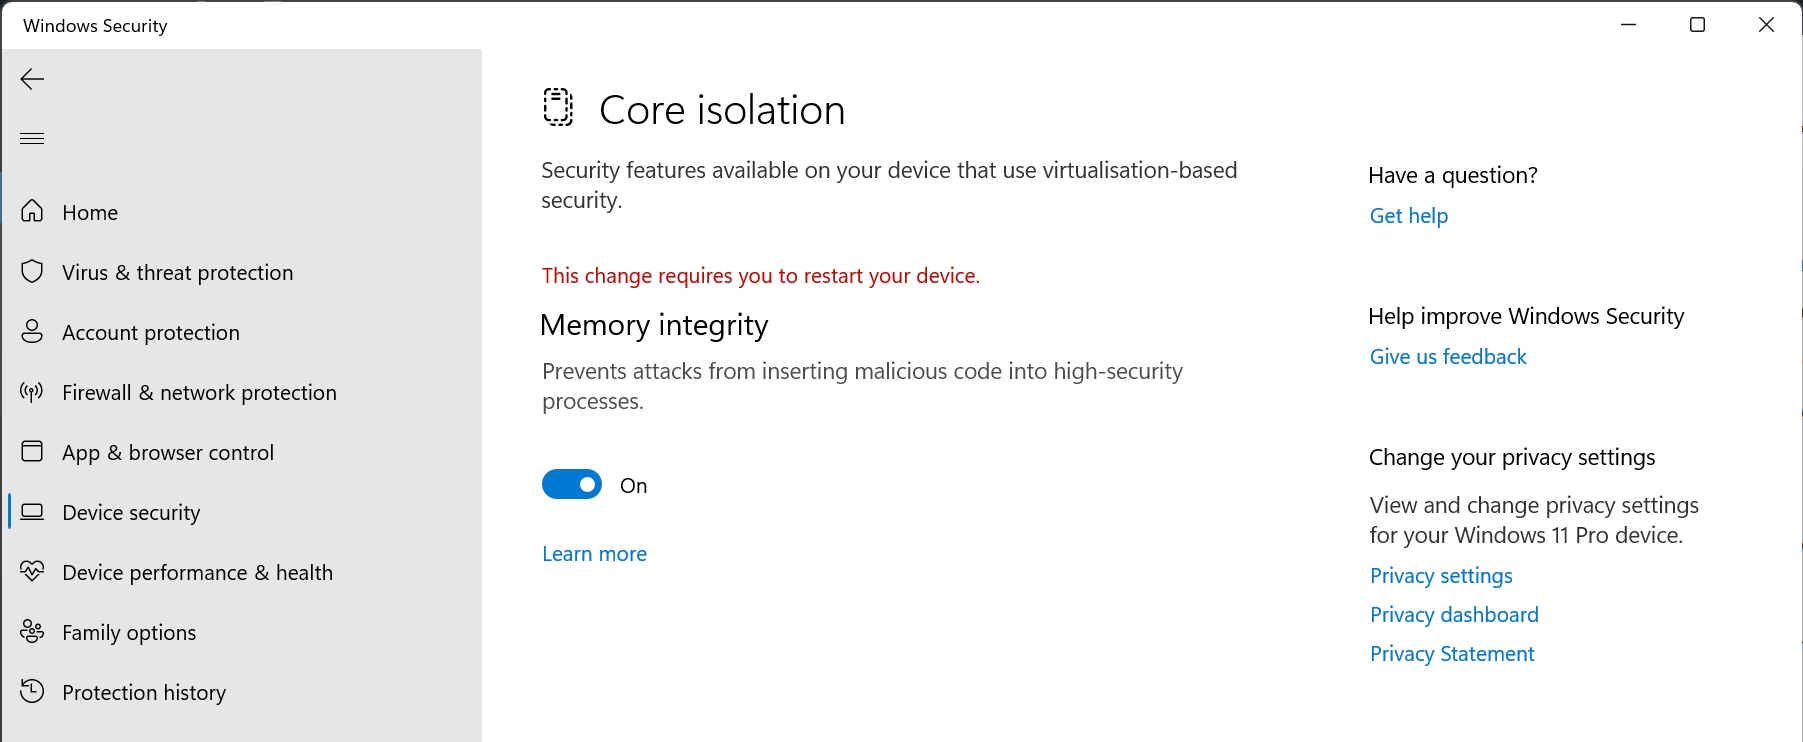
Another configuration option that wasn’t available until Secure Boot was flipped was the Memory integrity choice in Security > Device security > Core isolation. I did turn this on and rebooted, but note that Microsoft says it may impact gaming performance. Most of my gaming is on the Xbox anyway, so I don’t think I’ll notice.
Core applications
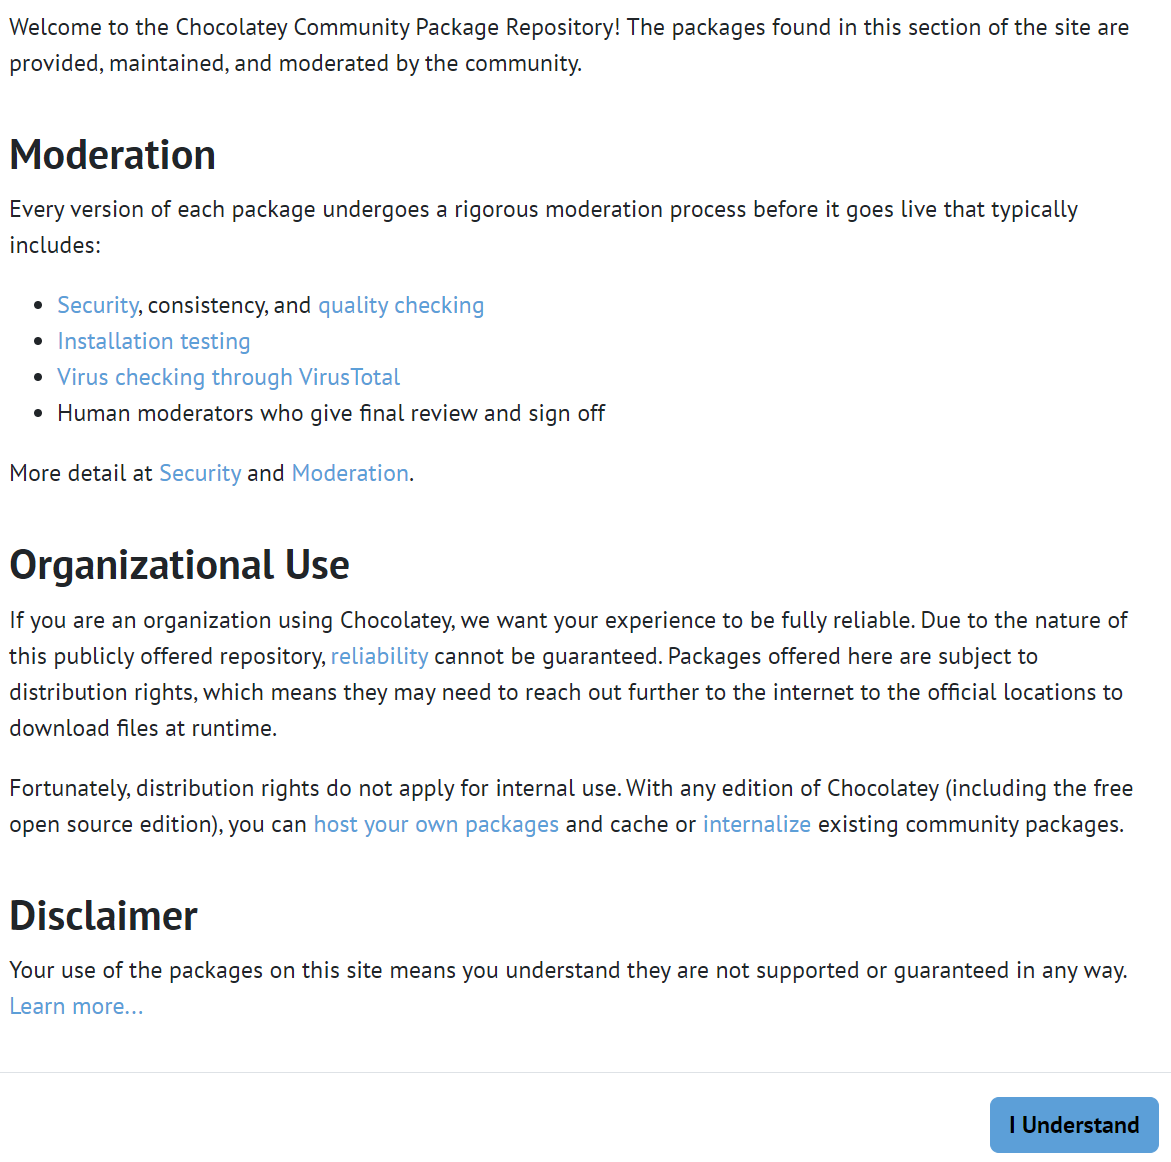
In the past I’ve used tools like Ninite to batch-install applications, and the new hotness appears to be Chocolatey, but their large package repository warning (entirely prudent, I might add) on first load doesn’t actually give me the confidence. I guess the tradeoff here is that you’d have a centralized spot to update all your applications, but most of the things I’d install anyway have their own background update daemons.
Instead of using Chocolatey’s packages and Ninite, I installed the following from their official sites or built-in VSCode tooling:
- 1Password, as well as the official Chrome and Firefox extensions
- Docker (inside WSL; initiated through VSCode Dev Containers extension)
- Git
- GitHub Desktop
- Python 3.12
- Visual Studio Code with extensions:
- Dev Containers, which brought in Ubuntu and also prompted me to install a Linux kernel update package in a console window that disappears after a few seconds
- Python
- vscode-icons
- WSL
I deliberately did not install Zoom. This is a desktop machine without a connected webcam. Most of my Zoom meetings are for work and conducted on the corporate device, or I’ll likely use my other laptop. Like nearly all software, Zoom has had security vulnerabilities in the past, so not installing it reduces the potential attack surface.
Debloating
Like “registry cleaners”, you likely don’t want to run any debloating scripts as they may remove necessary Windows components. I poked around on Reddit a bit and found the following posts:
- https://www.reddit.com/r/Windows11/comments/10bmxy8/fresh_windows_11_install_how_to_optimize_what_to/
- https://www.reddit.com/r/Windows11/comments/17cy9uv/win_11_fresh_install_what_are_the_first_things/
- https://www.reddit.com/r/Windows11/comments/17fqeb4/what_do_you_install_first_on_a_new_windows_install/
This will be much more about customization within the Windows interface. Specifically I went through the high-level Settings categories, and made changes similar to the ones in this top-ranked post:
System > Notifications
Expand the Notifications category, then uncheck Show notifications on the lock screen and Show reminders and incoming VoIP calls on the lock screen. I did also deselect Allow notifications to play sounds but this will be a personal preference and may prevent things like email or messaging notifications from being as effective.
At the bottom of the Notifications panel, expand Additional settings and uncheck all the options to avoid additional suggestions.
System > Power
I turn off Sleep mode. The machine should get powered off entirely when not in use and avoid persisting state for long periods of time.
System > Storage > Storage Sense
Choose to Never make content online-only if not opened.
System > Multitasking
Don’t show tabs from apps when snapping or pressing Alt+Tab. (Those aren’t real windows!)
Under Snap windows, deselect When I snap a window, suggest what I can snap next to it. (This gesture feels to me like you’re forced to pick another application.)
I’m still debating how I feel about the On the taskbar, show all the open windows and Show all open windows when I press Alt+Tab settings in the Desktops category.
System > For developers
Enable the End Task setting for a convenient way to kill -9 a misbehaving application.
In File Explorer, choose Show file extensions, Show hidden and system files, and Show empty drives. I may go back for the Show full path in title bar option as well.
I did change the default terminal app to Windows Terminal and allowed local PowerShell scripts to run without signing – a possible security consideration though. While I was at it, I pinned Terminal both to the taskbar and to Start, and was promptly irritated not being able to see Terminal in the Start window by all the default/suggested content – the newly added Terminal link requires scrolling down.
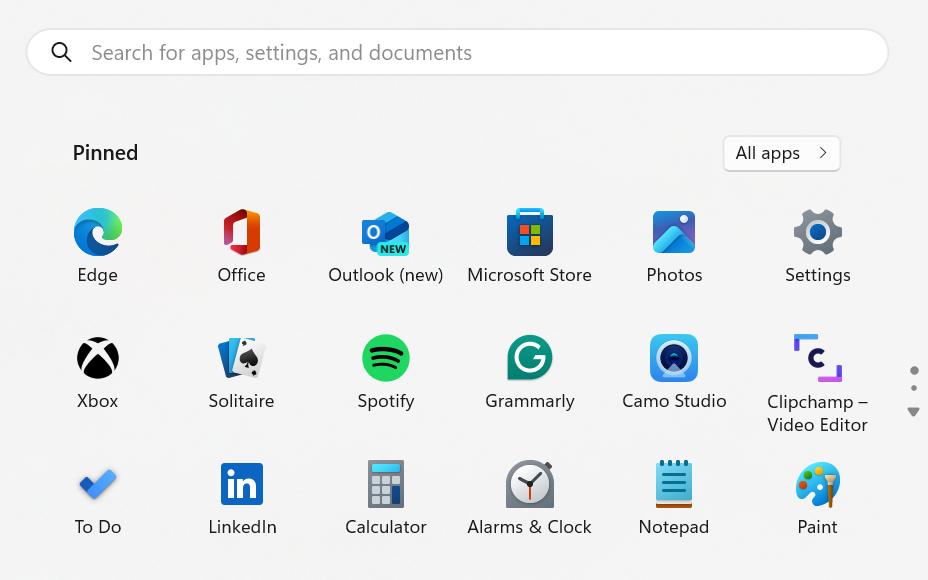
I took the opportunity to clear this list out by unpinning or uninstalling some of the applications. Before unpinning it, I did also open the Office application and chose the Install apps button (right side of the page), then picked the Microsoft 365 (64-bit) version to make sure the desktop versions of Word, Excel, PowerPoint, Outlook, and OneNote made their way onto disk. They’ll get auto-pinned here once installation finishes.
The Recommended section in the Start menu can be shrunk as part of the Personalization options in Settings, later, but apparently not entirely removed.
System > System Components
Turns out you can’t remove some components from this UI, such as Get Help, Tips and Your Phone due to some very marketing-esque logic. However, there is a deep link into the Apps section of Settings to uninstall some of the frontends – we’ll get to that shortly.
System > Clipboard
Uncheck Suggested actions. You may like Clipboard history, I’ve often found it confusing.
System > Optional features
I installed OpenSSH Server and RSAT: Group Policy Management Tools. I am still waffling on enabling Remote Desktop (RDP) and OpenSSH is also debatable, but I figured some headless way to get into the system may prove useful in the future.
The default installed features seemed fairly benign; I did, however, remove Extended Theme Content, Facial Recognition (Windows Hello), Internet Explorer mode, Math Recognizer, Steps Recorder, Windows Media Player Legacy and WordPad.
The More Windows features link calls out to a separate dialog. I did install Telnet Client, Windows Sandbox and Windows Subsystem for Linux and removed Work Folders Client.
Bluetooth & devices > Mouse
Increased mouse pointer speed to 11 from 10.
Bluetooth & devices > AutoPlay
Didn’t we learn our lesson from the Sony rootkit? Turn AutoPlay off.
Network & internet
I was about to change the network configuration settings to Private network to enable file sharing and show my Synology devices in the Network view of File Explorer, but turns out if you know the hostname or IP address of the storage appliance you can still have your machine act as a SMB/CIFS client without enabling network discovery, file sharing or relaxing the Windows Firewall settings.
Personalization > Background and Personalization > Colours
Hearkening back to my Windows 2000 days, I picked a nice solid background colour with an accent colour to match. I also disabled the transparency effects, even though I’m sure they’re not highly taxing on the GPU.
Personalization > Themes
I used the Sounds link at the top to select No sounds. Then, popping out to the Desktop icon settings dialog, I turned This PC and User’s Files in addition to Recycle Bin.
Personalization > Dynamic Lighting
Turn off Use Dynamic Lighting on my devices. (While I am into the Philips Hue ecosystem, I don’t have anything connected to this machine that would be relevant.)
Personalization > Lock screen
Doesn’t seem like solid colour is an option here, so change the Personalize your lock screen setting to Picture, and pick something inoffsensive. Uncheck Get fun facts, tips, tricks and more on your lock screen. Also, change Lock screen status to None, and deselect Show the lock screen background picture on the sign-in screen.
Personalization > Start
- Pick More pins layout
- Deselect Show recently added apps
- Deselect Show recently opened items in Start, Jump Lists, and File Explorer
- Deselect Show recommendations for tips, shortcuts, new apps, and more
Personalization > Taskbar
- Hide Search
- Hide Copilot (preview)
- Hide Task view
- Hide Widgets
- Expand Taskbar behaviours and adjust alignment, auto-hide, and combine taskbar buttons settings to your preference
Apps > Installed apps
Remove your least favourites. I suggest:
- Cortana
- Feedback Hub
- Mail and Calendar
- Maps
- Microsoft News
- People
- Power Automate
- Quick Assist
Apps > Advanced app settings
Turn Share across devices and Archive apps off.
Apps > Startup
Turn off Microsoft Edge and Logitech Download Assistant (somehow this got installed when Windows recognized my MX Master 2.)
Time & language > Typing > Advanced keyboard settings
Choose Use the desktop language bar when it’s available, then pick the Language bar options link. Pick Hidden, and make sure you remove any keyboard shortcuts for language or keyboard selection. If you’re like me with English (Canada) available but with no desire to use a French Canadian-style keyboard, this should cause the “ENG US” icon next to the clock to disappear.
Accessibility > Visual effects
Turn on Always show scrollbars and turn off Animation effects.
Privacy & security
This section has a large number of categories; pick the most reasonable choices for you. I generally chose to disallow suggestions and notifications where possible.
Windows Update
Ensure Get the latest updates as soon as they’re available is turned off (this applies to feature updates, not security.)
After one week
The machine feels fairly performant; certainly more than the previous Win11 installation. I think the trick to maintaining performance will be to ensure that any one-time-use software gets installed in a virtual environment and to keep the number of things installed on the base operating system relatively minimal.
I haven’t gotten the usual suspect game stores back up and running, so I’ll also have to be cautious about Steam, Epic, Ubisoft, EA and other “launchers” and what they bring in.